Showing posts with label Dessert. Show all posts

Sunday, March 4, 2012

Rolo Cake Mix Bars

I recently took these delicious cake bars to a friend of mine who had just had surgery, they were very simple to make with few ingredients.  I found them on Pinterest and the blog they came from can be found here.  Kids love Rolo candy so this is a great treat to have them help with.  Enjoy.
Ingredients:
  • 1 (18.25 oz) yellow, vanilla, or white cake mix (I used Duncan Hines), dry
  • 5 oz evaporated milk
  • 1/4 cup butter, melted
  • 40 Rolo candies, unwrapped and cut in half
Directions: 
Preheat oven to 350 degrees  and spray a 9x13 pan with cooking spray.
With your mixer, beat cake mix, evaporated milk and butter until combined.  Mixture will be thick and sticky.
Divide batter in half and press half of the batter onto the bottom of the 9x13 pan.
Bake until set, approximately 8-9 minutes.
Remove base from oven and place Rolo candies, caramel-side down on top.
Drop remaining batter on top of Rolos in teaspoon sized amounts.
Bake 20-24 minutes longer until top begins to golden.
Cool completely before cutting into them.

Monday, December 5, 2011

Chocolate Peppermint Cupcakes

The Chocolate Peppermint Cupcakes were a HIT!  
This is a quick and easy recipe you must try.

Ingredients:
Cake:
1 box Chocolate Devils Food Cake Mix
1 pkg York Peppermint Patties
Peppermint Butter cream Icing: 
2 sticks butter
Powdered Sugar
Peppermint Extract
Milk

Directions:

Make cake mix according to instructions on the box.  Fill cupcake liners about half full and then top with a York Peppermint Patty.  Now add remainder of batter on top of the Peppermint Patties. 
Bake according to cake mix instructions.  Remove from oven and let cook completely.

To make butter cream frosting combine softened butter and powdered sugar.  I start with one small box and then blend with hand mixer until it reaches desired consistency.  You can add a little milk to thin the icing if necessary or a little more powdered sugar to thicken it up more.  When you have the icing the way you want add a few drops of Peppermint extract.  Mix icing and taste, adding more extract if you want.  The icing should be minty but not overpowering.  Put icing in a large plastic zip-lock bag and cut off one corner.  Now you can easily pipe the icing onto your cooled cupcakes.  Garnish with crushed peppermint candy or maybe Andes Mints.  I also think I small candy cake placed in the top would be cute.  Make these soon - your holiday guests will surely be amazed and of course the kids (and spouse) will too!

Sunday, November 6, 2011

Cinnamon Roll Pull Apart Bread

Once again I found another GREAT recipe on Pinterest!
This one is from the blog: Plain Chicken.
It got RAVE reviews from all the family! And better yet it was EASY! Really EASY! 
Ingredients:
1 unsliced round loaf sourdough bread


1/2 cup butter, softened
1/4 cup powdered sugar
1/4 cup honey
1 tsp pure vanilla extract

1/2 cup sugar
1 tsp cinnamon

1 cup powdered sugar
1-2 Tbsp milk

Directions: 
Preheat oven to 350 degrees.

To make Vanilla Honey Butter: Whip butter and 1/4 cup powdered sugar together until smooth; stir in honey and vanilla.  Set aside. (You can use regular butter if desired)

Cut the bread lengthwise into 1/2" slices, without cutting through the bottom crust. Spread vanilla honey butter in between slices.  Rotate the bread 90 degrees and slice the bread again into 1/2" pieces, without cutting through the bottom crust. Spread more vanilla honey butter in between new cuts. This doesn't need to be perfect - just make sure there is lots of butter in between all the cuts. Combine sugar and cinnamon. Generously sprinkle in between all cuts.

Wrap in foil; place on a baking sheet. Bake at 350 degrees for 25-30 minutes, until bread is warm.  Unwrap cinnamon bread and place on serving platter.  Combine powdered sugar and milk - adding milk until you get the consistency desired.  Drizzle icing over bread and serve immediately.

We had some company Saturday morning when I made this and put it on the coffee table to eat he said, "that looks like a blooming onion!"  That is certainly what it will remind you of...fun to eat too...The only problem is it's so easy to keep plucking off little, yummy bites of the bread!  Try this and you will not be disappointed!

Sunday, October 16, 2011

Apple Fritter Muffins

Today I noticed I had some gala apples that were getting a bit soft...instead of throwing them away I started searching for a recipe.  I found this recipe for Apple Fritter Muffins when looking around on Pinterest.  They turned out quite well.
Ingredients:
For the Apples:
2 large apples, 1/4 inch dice (I used 4 small gala apples)
3 tbsp butter
1/3 cup granulated sugar

2 tsp cinnamon
2 tbsp water
1/3 cup flour
For the Muffins:
2 large eggs
1/4 cup applesauce
1/4 cup canola oil
1 cup granulated sugar
1/3 cup brown sugar
1 tsp vanilla extract
2 1/3 cups all-purpose flour
1 1/2 tsp baking powder
1/2 tsp baking soda
3 tsp cinnamon
1/2 tsp salt
1 cup buttermilk

For the Glaze:
2 tbsp butter melted
1 cup confectioners sugar
1 tsp vanilla
1 tbsp hot water

Directions: 
  1. Preheat oven to 400 degrees F. 
  2. Line 14 muffin cups with muffin liners  and lightly spray the liners with cooking spray.
  3. In a saucepan add apple ingredients except flour and cook over medium heat until apples are tender, about 8-10 minutes.  Stir in flour to coat apples (this prevents apples from sinking to bottom of muffins)
  4. In a medium bowl whisk together flour, baking powder, baking soda, cinnamon and salt.
  5. In a large bowl beat together applesauce, oil, and sugars till smooth. Beat in eggs, one at a time. Add vanilla and mix thoroughly  
  6. Stir the flour into the applesauce mixture alternately with the buttermilk, beginning and ending with the flour and making sure everything is thoroughly combined. Gently stir in apples until just combined.
  7. Spoon batter into cups, filling the cups almost full. Divide batter equally among prepared muffin cups. Bake until muffin tops are a pale golden and springy to the touch, 15 to 17 minutes, rotating halfway through baking time.
  8. Cool muffins in pan for 5 minutes, then transfer to wire rack and cool 10 minutes before glazing. 
  9. To make the glaze, In a medium bowl mix together the melted butter, confectioners sugar, vanilla and water. Whisk until smooth. 
  10. When muffins have cooled slightly, dip the muffin top into the glaze and allow the glaze to harden. 
ENJOY!

Sunday, October 2, 2011

Banana Pudding Cupcakes

My little boy had been asking for cupcakes all day today.  For those of you who know him you know he can be pretty persistent about getting a C-U-P-C-A-K-E!  We were out running errands so I thought I would make him happy by picking up a cupcake at Starbucks...but much to my surprise they were out of those yummy things.  So we came home and I started looking for what I might have on hand (I refused to go to the grocery store one more time) to throw together a cupcake surprise for him.  Here's the end result - Banana Pudding Cupcakes! 
I only had half a cake mix, so this recipe will need to be doubled if you are using a whole cake mix! 

Ingredients:
Half a box of French Vanilla or Yellow cake mix
1/4 cup vegetable oil
1/4 cup sour cream
1 single serve container vanilla or banana pudding
1 egg and 1 egg white
Vanilla Wafers (9 for cupcakes and about 15 more for garnish)
1 banana sliced and tossed in a little lemon juice to keep from turning
Icing:
Whipped Topping (I used the kind in the can)
Crushed Vanilla wafers and wafers cut in half for garnish

Directions:
Mix cake mix with 1/4 cup sour cream, 1/4 cup vegetable oil, 1 egg, 1 egg white and container of vanilla pudding until well blended.  Do not follow cake mix instructions on the box.  Line muffin pan with cupcake liners and lightly spray with Pam.  (This is a nice trick to keep cake from sticking - just don't spray too much!) Put a small amount of cake batter in each cupcake liner (about a spoon full) Then add one whole vanilla wafer and top with two slices of banana.
Now top each with enough batter to completely cover the bananas.  As you can see I fill mine pretty full.
Bake cupcakes at 350 degrees for about 18-20 minutes or until done in the center.
Remove cupcakes from oven and let cool completely.  

Do not top with whipped cream until you are ready to serve the cupcakes and only top with the cupcakes you are going to be eating at that particular time, using the whipped cream in the can allows you to make them really pretty.  After adding the whipped cream garnish with vanilla wafer crumbs and half a vanilla wafer.  They are gorgeous and really taste like Banana Pudding!
E-N-J-O-Y!

Friday, September 30, 2011

Caramel Apple Cupcakes - AMAZING!

I made these amazing Caramel Apple Mini Cupcakes last week for a small dinner party we threw.  They turned out wonderful!  This is the perfect Fall cupcake!
Cake Ingredients:
1 box French vanilla cake mix
1 can apple pie filling
1 - 2 teaspoons apple pie spice
3 eggs


Directions:
1.    Preheat oven to 350 degrees.
2.   Open the can of pie filling.  Using a knife, slice the large pieces of apple into smaller, bite-sized pieces.  I did this with the filling still in the can by inserting the knife into the center and letting it hit the bottom and then cutting against the wall of the can all the way around. 
3.   In a bowl, mix together the cake mix, eggs, pie filling and apple pie spice.  If you don’t have apple pie spice you can use cinnamon and nutmeg.
Spoon batter into cupcake liners and bake for 14-18 minutes or until a toothpick comes out clean.  Let cool completely.  


Cream Cheese Buttercream Ingredients:
½ cup butter
8 oz cream cheese
1 - 2 lb box powdered sugar. 
1 t. apple pie spice
¼ cup caramel sauce (store bought)

Directions:
1.  Let butter and cream cheese soften at room tempature.
2.  Mix butter and cream cheese with mixer until well combined and then gradually add powdered sugar until desired consistency.  Mix in apple pie spice.  Put icing in piping bag or ziplock bag and then pipe onto cupcakes.  Gently drizzle caramel sauce on top then refrigerate.  

I halved this recipe and it made 24 mini cupcakes.  If you half the cake, half the icing too.  ENJOY!


Thursday, September 29, 2011

Chocolate Chip Streusel Pumpkin Bread

My family LOVES the flavor of pumpkin!  Yesterday I baked this delicious bread - everyone loved it! 
Ingredients:

  • 2 cups sugar
  • 1 15 oz. can of canned pumpkin (not pumpkin pie filling)
  • 1/4 cup vegetable oil
  • 1/4 cup applesauce 
  • 1/2 cup fat-free vanilla pudding (I used one single serving container)
  • 2 large eggs
  • 3 cups all-purpose flour
  • 3 teaspoons pumpkin pie spice
  • 1 1/4 teaspoons salt
  • 1 teaspoon baking soda 
  • 1 cup semisweet chocolate chips
  • 1/3 cup oats
  • 1/3 cup brown sugar
  • 1/2 stick butter cut into small pieces
  •  Cooking spray  
Directions:
  • Preheat oven to 350°.
  • Combine first 6 ingredients in a large bowl, stirring well with a whisk. Lightly spoon flour into dry measuring cups; level with a knife. Combine flour, pumpkin pie spice, salt, and baking soda in a medium bowl, stirring well with a whisk. Add flour mixture to pumpkin mixture, stirring just until moist. Stir in chocolate chips.
  • Spoon batter into 2 (8 x 4-inch) loaf pans coated with cooking spray. Make streusel topping by combining small chucks of the butter with brown sugar and oats (I do this with my hands) and then sprinkle evenly on top of each loaf.  Bake at 350° for 1 hour and 15 minutes or until a wooden pick inserted in the center comes out clean. Cool 10 minutes in pans on a wire rack, and remove from pans. Cool completely on wire rack.
Enjoy for a light dessert or maybe even for a breakfast treat! 


Saturday, September 3, 2011

Chocolate Pudding Cupcake Cups

With inspiration from a blog post I had seen for little chocolate bowls I decided to give it a try.  Originally the directions were to blow up a balloon and dip the bottom part in chocolate in order to make a bowl of sorts.  We gave this a try but it didn't go so well - three balloons popped after the chocolate was on them and we had melted chocolate flying everywhere!!  What a mess!

In an effort to salvage the chocolate bowls I decided to try something else - so after I melted my chocolate we poured them into cupcake liners, making sure to get the sides really good.  You have to pour the extra chocolate back into your bowl.  They look something like this:
Place the chocolate covered cupcake liners in the refrigerator until set.  Once they are set the liner just pulls away from the chocolate shell...leaving a cute little, edible chocolate liner!  Kids think this is just too cool.  You can then use these cups for ice cream or fruit - but we used them for some homemade (from scratch) chocolate pudding.  You can find the recipe I used for that here: homemade chocolate pudding - I left out the peanut butter since my little one is allergic and it was great as just chocolate.  We finished the creation with whipped cream....they actually turned out looking like a cupcake!  ENJOY!

Tuesday, August 30, 2011

Chocolate Chip Cookie Dough Cupcakes


These cupcakes are fantastic...my family was very happy I made them today. I found them on a great blog called The Larson Lingo  I only had a bite since I have been watching my sugar intake but I can tell you from that one bite these are a must try...very easy and impressive.  Here's what you need:

1 box devils food cake mix (any brand)
1 package ready to cook chocolate chip cookie dough (I used Nestle break apart)
Frosting of your choice - I made my own vanilla (recipe to follow) but any will do.

Prepare devils food cake per box instructions.  Fill cupcake liners a little more than half full and then add one pieces of the cookie dough to center.  Bake at 350 degrees for about 18 minutes.  Let cupcakes cool completely.  

Vanilla Butter Cream Frosting
1 box powdered sugar
1/ 2 teaspoon vanilla
1/4 cup milk
1 stick of butter at room temperature

Combine frosting ingredients and mix well with mixer.  When frosting is at the desired consistency put in a large ziplock bag and clip off one corner and start frosting away.
Here's what the cupcakes look like in the middle - the cookie dough is cooked but still soft - YUM!

Wednesday, August 24, 2011

Eating Veggies - Garden Harvest Cake

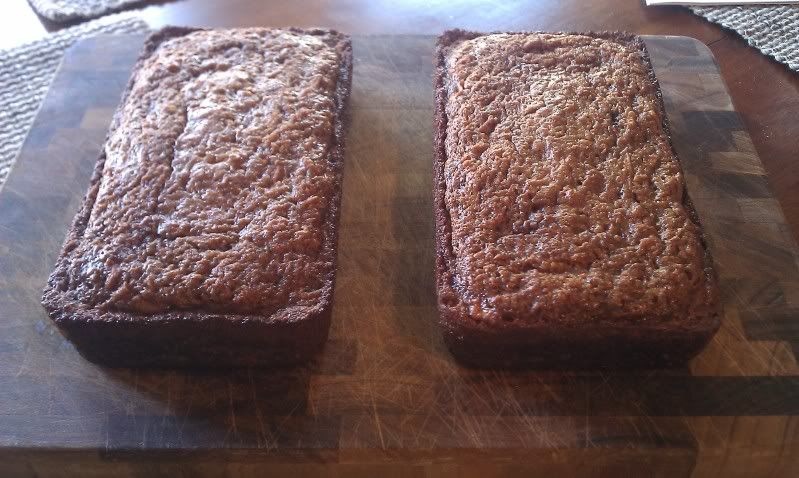
I am going to share one of my favorite recipes with you, it's a Cooking Light recipe for a yummy Garden Harvest Cake -( click here to read the reviews)...my husband calls it 'bread' because it's made like banana or zucchini bread...guess that makes him feel less guilty when he eats 2-3 pieces.  Seriously it is great served any time of the day...breakfast - toasted with a bit of cream cheese or for a light snack!  This is a great way to add some veggies to your kids diet...the carrots and zucchini are grated so fine they will never know it's in there.  I also replace the oil in the recipe with applesauce to cut down on the fat.  

Ingredients:

1 cup all-purpose flour  
3/4 cup sugar 
2 teaspoons ground cinnamon 
1 teaspoon baking soda 
1/4 teaspoon salt 
1/2 cup grated peeled Granny Smith apple (about 1 medium) 
1/2 cup grated carrot (about 1 medium) 
1/2 cup shredded zucchini 
1/4 cup chopped walnuts, toasted (optional) 
1/4 cup canola oil (or 1/4 c. applesauce) 
1/4 cup nonfat buttermilk 
2 large eggs 
Cooking spray   

Directions:  
1. Preheat oven to 350°.
2. Lightly spoon flour into a dry measuring cup; level with a knife. Combine flour and the next 4 ingredients (through salt) in a large bowl, stirring with a whisk. Add grated apple, grated carrot, shredded zucchini, and walnuts to flour mixture; toss well. Combine canola oil, buttermilk, and eggs in a small bowl, stirring with a whisk. Add egg mixture to flour mixture, stirring just until combined. Spoon batter into an 8 x 4–inch loaf pan coated with cooking spray. Bake at 350° for 50 minutes or until a wooden pick inserted in the center comes out clean. Cool 10 minutes in pan on a wire rack; remove cake from pan. Cool completely on wire rack before slicing.

This recipe can easily be doubled and one loaf can even be frozen to be enjoyed later!